Skip Fancy Restaurants: Craft Delicious Bulgur Wheat at Home Today
Have you ever encountered bulgur wheat on a menu at an upscale restaurant, perhaps in a gourmet salad or a meticulously plated side dish, only to wonder if this seemingly simple grain was worth the premium price tag? It's a common misconception that bulgur wheat is an exotic, complex ingredient best left to professional chefs. However, we're here to debunk that myth! Bulgur wheat is not only incredibly delicious and remarkably versatile, but it's also surprisingly simple and rewarding to make right in your own kitchen. Forget those expensive restaurant bowls; mastering
how to make bulgur wheat at home is an accessible culinary skill that will elevate your meals and expand your pantry.
This ancient grain, often overlooked, deserves a permanent spot in your cooking repertoire. It’s a powerhouse of nutrition, a fantastic textural component, and a blank canvas for countless flavors. By learning to prepare it yourself, you gain control over the quality, save money, and unlock a world of healthy, homemade possibilities. So, put away your hesitations and get ready to discover the ease and satisfaction of creating perfect bulgur wheat from scratch.
What Exactly *Is* Bulgur Wheat? Understanding This Ancient Grain
Before we dive into the cooking process, let's clarify what bulgur wheat actually is. Many people mistakenly think it's a type of grain, similar to quinoa or farro. In reality, bulgur wheat isn't a distinct grain species; it's a processed form of wheat kernels, most commonly durum wheat, which is also used to make pasta and couscous.
The magic of bulgur lies in its preparation: whole wheat berries are first
par-boiled (partially cooked), then dried, and finally
cracked or ground into various sizes. This par-boiling step is what distinguishes bulgur from ordinary "cracked wheat," which hasn't undergone this pre-cooking process. The par-boiling means bulgur cooks much faster and retains more of its nutritional value, making it incredibly convenient for home cooks.
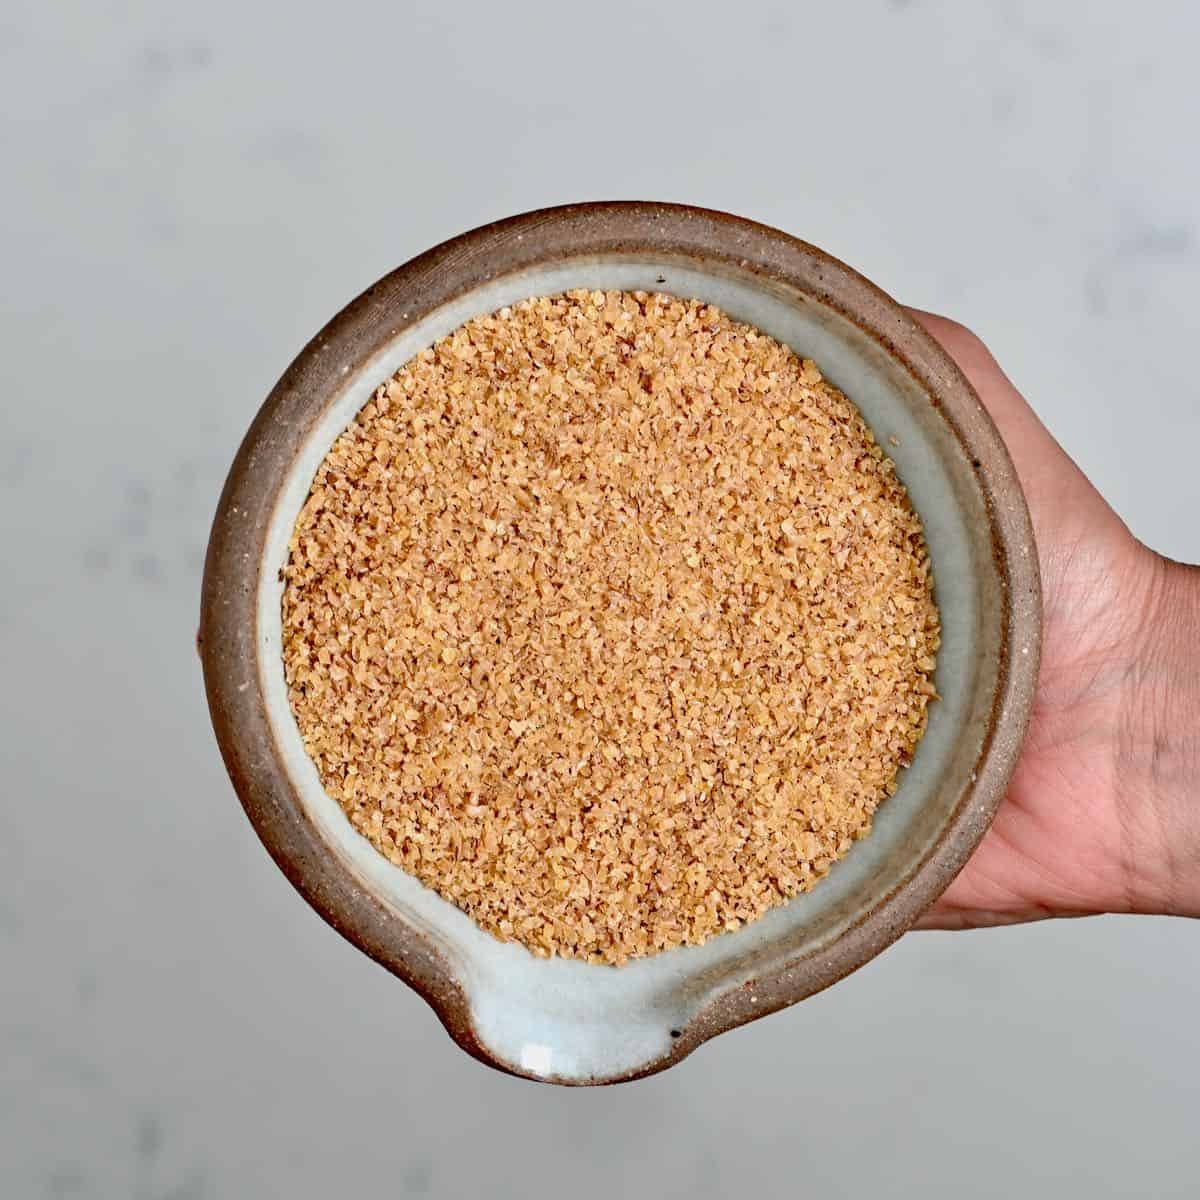
Bulgur comes in different grinds—fine, medium, coarse, and extra coarse—each suited for different culinary applications. Fine bulgur is perfect for dishes like tabbouleh, while coarser grinds excel in pilafs, stews, and as a hearty side. When you make bulgur at home from whole wheat berries, you’ll typically end up with a texture akin to medium or coarse bulgur, offering a delightful chewiness and robust structure ideal for a wide range of recipes. Its rich, nutty flavor and satisfying texture make it a staple in Mediterranean and Middle Eastern cuisine, from vibrant salads to comforting main dishes.
Why DIY Bulgur Wheat? The Benefits and Versatility on Your Plate
Deciding to make bulgur wheat at home offers a multitude of benefits that extend beyond mere cost savings. It’s an empowering culinary journey that puts you in control of your food.
1.
Unbeatable Freshness and Quality: When you prepare bulgur from whole wheat berries, you ensure the freshest possible product, free from additives or preservatives often found in packaged goods. You control the initial quality of the wheat, leading to a superior taste and texture.
2.
Economic Advantage: Whole wheat berries are typically far less expensive than pre-packaged bulgur or specialty grains. Making it yourself is a budget-friendly way to enjoy a nutritious and versatile ingredient.
3.
Nutritional Powerhouse: Bulgur wheat is an excellent source of dietary fiber, promoting digestive health and sustained energy. It's surprisingly low in calories for its density and incredibly filling, making it a fantastic addition to a balanced diet. It can help with satiety, making you feel fuller for longer, which can aid in weight management.
4.
Incredible Versatility: Treat bulgur wheat much like you would rice, couscous, or pasta. It’s a perfect carb side dish for virtually any meal, from grilled meats and roasted vegetables to vibrant curries. You can use it to bulk out soups and stews, providing a hearty, nutritious base. Imagine it as the star of a hearty chili, a warming winter stew, or a refreshing summer salad. It absorbs flavors beautifully, making it an ideal canvas for herbs, spices, and sauces. For more reasons to incorporate this grain into your meals, explore
Why Make Bulgur Wheat at Home? Healthy, Versatile & Easy.
5.
Satisfying Culinary Experience: There's a profound satisfaction that comes from transforming basic ingredients into something delicious and wholesome. Making bulgur wheat from scratch is a simple yet rewarding process that connects you more deeply with your food.
Your Step-by-Step Guide: How to Make Bulgur Wheat at Home
Ready to embark on your bulgur-making adventure? The process is surprisingly straightforward, requiring minimal equipment and ingredients. Here’s a detailed guide on
how to make bulgur wheat at home:
What You'll Need:
* 1 cup whole wheat berries (e.g., hard red winter wheat, durum wheat)
* 1 tsp salt
* Cold water
* Large bowl for soaking
* Saucepan with a tight-fitting lid
* Strainer
The Process:
1.
Soak Overnight (The Hydration Kickstart):
Transfer your 1 cup of whole wheat berries to a large bowl. Cover them generously with cold water – at least 2-3 inches above the wheat. Leave them to soak overnight (8-12 hours) at room temperature. This crucial step begins the rehydration process, softening the kernels and significantly reducing their subsequent cooking time. It also helps in breaking down starches, making the wheat easier to digest.
2.
Drain and Rinse (Prepare for Cooking):
In the morning, drain the soaked wheat berries completely using a fine-mesh strainer. Give them a quick rinse under cold running water to remove any loose starches.
3.
Boil to Perfection (The Par-Boiling Stage):
Transfer the drained wheat berries to your saucepan. Add enough fresh water to cover the wheat by at least 2 inches. This ensures there's ample liquid for the grain to absorb and cook through without drying out. Stir in the 1 tsp of salt. The salt is vital for infusing flavor throughout the grain as it cooks, preventing blandness.
Bring the water to a rolling boil over medium-high heat. Once boiling, reduce the heat to low, cover the saucepan with a tight-fitting lid, and let it simmer for approximately 60 minutes.
4.
Check for Doneness (The Texture Test):
After 60 minutes, check the wheat for doneness. The bulgur should be tender but still have a pleasant, slightly chewy texture. It should break apart easily with pressure from your finger and thumb, and when bitten into, it should not feel hard or unyielding. If it's still too firm, continue simmering, checking every 10-15 minutes, adding a little more water if needed.
5.
Fluff and Serve (Instant Enjoyment):
Once cooked to your desired tenderness, remove the saucepan from the heat. Keep it covered for another 5-10 minutes to allow the bulgur to steam and absorb any remaining moisture. Then, uncover and fluff with a fork. Your homemade bulgur wheat is now ready to serve immediately! Season it further if desired, with a drizzle of olive oil, fresh herbs, or a squeeze of lemon juice.
For a deeper dive into perfecting this process and more tips for success, be sure to check out
Master Homemade Bulgur Wheat: Simple Steps for Delicious Grains.
Mastering Your Bulgur: Troubleshooting and Flavor Tips
Even simple recipes can sometimes present small challenges. Here's how to troubleshoot common issues and enhance the flavor of your homemade bulgur:
*
Bulgur Refusing to Cook / Water Evaporating Too Quickly: If your bulgur remains hard and all the water has evaporated, it's likely due to one of two reasons: either you didn't add enough water to begin with, or your pot wasn't lidded properly, allowing too much moisture to escape. Simply add another half cup to a cup of hot water, re-cover, and continue simmering until tender. Ensure your lid creates a tight seal.
*
Bland Flavor: If your cooked bulgur lacks any significant taste, the culprit is almost certainly insufficient salt. Since bulgur is essentially a boiled grain, it relies heavily on salt to bring out its natural flavors. Don't be shy! Feel free to add a few more dashes of salt to the cooked bulgur, stir well, and taste again. You can also cook it in vegetable or chicken broth instead of plain water for an added layer of savory depth.
*
Adding Aromatics: Elevate the flavor profile by adding aromatics to the cooking water. A bay leaf, a crushed garlic clove, a slice of onion, or a few peppercorns can infuse your bulgur with subtle, delightful notes. Remove them before serving.
*
Toasting for Depth: For an even nuttier flavor, you can lightly toast the drained, soaked wheat berries in a dry saucepan over medium heat for 2-3 minutes before adding water and salt. This brings out their inherent depth.
Storing Your Homemade Bulgur Wheat (and Grinding Options)
One of the great advantages of making bulgur at home is the ability to prepare a larger batch and store it for future use.
If you wish to store your cooked bulgur, you'll need to dehydrate it first. Spread the cooked bulgur in a single layer on baking sheets. Leave it to dry in a very low oven (around 150-200°F or 65-95°C) for several hours, or until the pieces are completely dried and hard. You can also use a food dehydrator if you have one.
Once completely dried, you have an optional but exciting step: grinding. For a finer bulgur, suitable for dishes like tabbouleh or as a quicker-cooking grain, transfer your now-dried bulgur pieces to a food processor or a sturdy blender. Pulse until they are broken apart into your desired consistency (fine, medium, or coarse). This gives you incredible control over the texture for different recipes.
Store your dried, cracked bulgur in an airtight container in a cool, dark pantry for up to 1 month. For longer storage, you can keep it in the refrigerator for several months or freeze it for up to a year. When you're ready to use your homemade dried bulgur, simply rehydrate and cook it as you would store-bought bulgur, though cooking times may vary slightly depending on the grind size.
Conclusion
Making bulgur wheat at home is a simple, healthy, and incredibly rewarding culinary endeavor. It demystifies an often-overlooked grain, transforming it from a "fancy restaurant" ingredient into an everyday staple. By following these steps, you'll not only master
how to make bulgur wheat at home but also gain a deeper appreciation for this versatile, nutritious, and delicious ancient food. So, ditch the gourmet prices, roll up your sleeves, and start crafting your own perfect bulgur today. Your taste buds and your wallet will thank you!